DriveThruRPG.com

Thursday, May 30, 2019

Workbench: Homebrewed Battle Mat

One of the things that I have really been frustrated by is the lack of any really gaming board.  Back in Vegas I had a full 4' x 6' desert board for a while (thanks to my days doing demos for Starship Troopers) and also a really handy 2' x 3' (small for units games but it was great for small games like Song of Blades and Heroes).  Unfortunately as I've mentioned elsewhere, all of this had to be dumped when we moved and though I've planned on making new ones in the five years since then... yeah, it just never happened.

It was during that time that the neoprene battle mats really hit the market and I've thought about grabbing one of those instead of building a full board.  More cost but less initial time investment which balances out but I've never pulled the trigger on one, just perused them online.  It was while looking for mat reviews that I actually stumbled across Creative Twilight and their post on making a DIY Wargaming Table and Terrain Set.  I looked through this article and they had some interesting ideas, especially what type of cloth to use for the gaming surface. I've dug around a number of times trying to find a suitable cloth but their recommendation really hit the nail on the head; tie dye blizzard fleece from Jo-Ann Farbics.

For their article, the guy at Creative Twilight used a khaki tie dye but I decided to go with the more traditional green and I really like how it looks.  Here it is with a basic terrain set up.


While it's certainly not the be all end all of terrain mats, I only spent $17 for a piece that is about 9' x 5' which more than I can see needing for a table.  I even cut off a foot or so for some quick terrain basing material like on the larger wooden discs I picked up to mark area terrain.  I'm even thinking about picking up another piece down the line in khaki so that I can throw out a quick desert table as well but for now rolling green will do.

As for the whole set up in the picture, this is a board that I threw together at the hotel for another game of Antares featuring the Algoryn vs the Concord.  It seems like the Concord are just getting soundly thrashed each time I've put them on the table so for this game I'm going to focus on Tactical choices to see if that makes a difference.  I did throw in a medic team for the AI just to balance out the points but for the most part its a straight up infantry battle.  So how did it turn out this time?  You'll have to come back to find out.  Until next time...

Monday, May 27, 2019

Strike on Kar'A Nine Scenario Five: The Final Confrontation

And here is the final battle for Kar'A Nine!  Strike leader Gesevo and his Concord troops have been thwarted several times but now they are bringing their full force to bear against the Algoryn defenders.  AI Leader Tomak is prepared though and leads his own troops onto the field of battle to face Gesevo and his Concord invaders.

For this scenario I decided to throw the book out the window.  This is supposed to be the big, climactic battle and I own enough to field larger forces than you get right from the box.  Unfortunately I am for space but I'm hoping that I can throw enough terrain on the board to make it an interesting fight.

So... without further ado...  let's take a look at the armies!

Concord Reconnaissance Shard Gesevo
Strike Command Squad: strike commander Gesevo (leader 2, slingnet and overload ammo for x-sling), spotter drone

Strike Squad Margil (green): strike leader Margil (leader, slingnet ammo for x-sling), plasma lance

Strike Squad Desthas (yellow): strike leader Desthas (leader, slingnet ammo for x-sling), plasma lance

Light drone support: C3D1 drone with spotter and batter drones

Targeter shard: five targeters

(All the names except for Gesevo were generated using a Star Wars Human name generator)

Algoryn Garrison Shard Tomak
AI Squad Tomak: AI leader Tomak (leader, plasma carbine, slingnet and overload ammo for x-sling), two troopers with x-launchers (slingnet and overload for both), three AI troopers, spotter drone

AI Squad Ratarr: squad leader Ratarr (leader, mag repeater, slingnet and overload ammo for x-sling), one trooper with x-launcher (slingnet and overload ammo), four AI troopers, spotter drone

Assault Squad Talrel: squad leader Talrel (leader), four assault troopers (all with mag repeaters and d-spinners)

Support Squad: two trooper crew with x-launcher (slingnet and overload ammo), spotter drone

Targeter shard: four targeters

(All the names except for Tomak were generated using a Star Wars Mandalorian name generator)

Both of these armies are 500 point scouting forces created using the normal force selector from the current army lists.  I tried to limit the number of overhead weapons but that's easier said than done; they tend to be the bread and butter for the Algoryn forces. 

The scenario is Let Battle Begin from the main rulebook (page 142).  Both armies have five order dice each so they both have a break value of three.  This means once either side has lost three order dice at the end of the turn a d6 is rolled.  On a 4 to 6 one more turn is played, otherwise the game is over.

For terrain, I decided to mirror the two sides of the board using the normal terrain from the Kar'A Nine scenarios plus I added in a couple of dense desert "woodland" pieces just to mix things up.  Once that was done it was on to deployment, with the Concord on the western edge and the Algoryn on the east.


Turn one began with the AI assault squad running forward into the dense scrub.


 The Concord activated next and took advantage of the fact by to take advantage of the follow ability of the command squad.  The command squad moved into cover behind a rocky barrier while the nearby C3D1 drone moved up next to them, giving them the added protection of its batter shield.


One of the strike squads was also close enough to be part of the follow order as well and they advance into the rocks to the south, opening fire on the AI assault squad.  Surprisingly they even manage to take out one of the assault troopers even though they have the benefit of cover.


The Algoryn activated next with the x-launcher patching through the nearby spotters to get line of sight to the southern strike squad.  With a lucky roll, they are able to drop a net round onto the strike squad and inflict the maximum pins possible (which is four, not five... oops!).


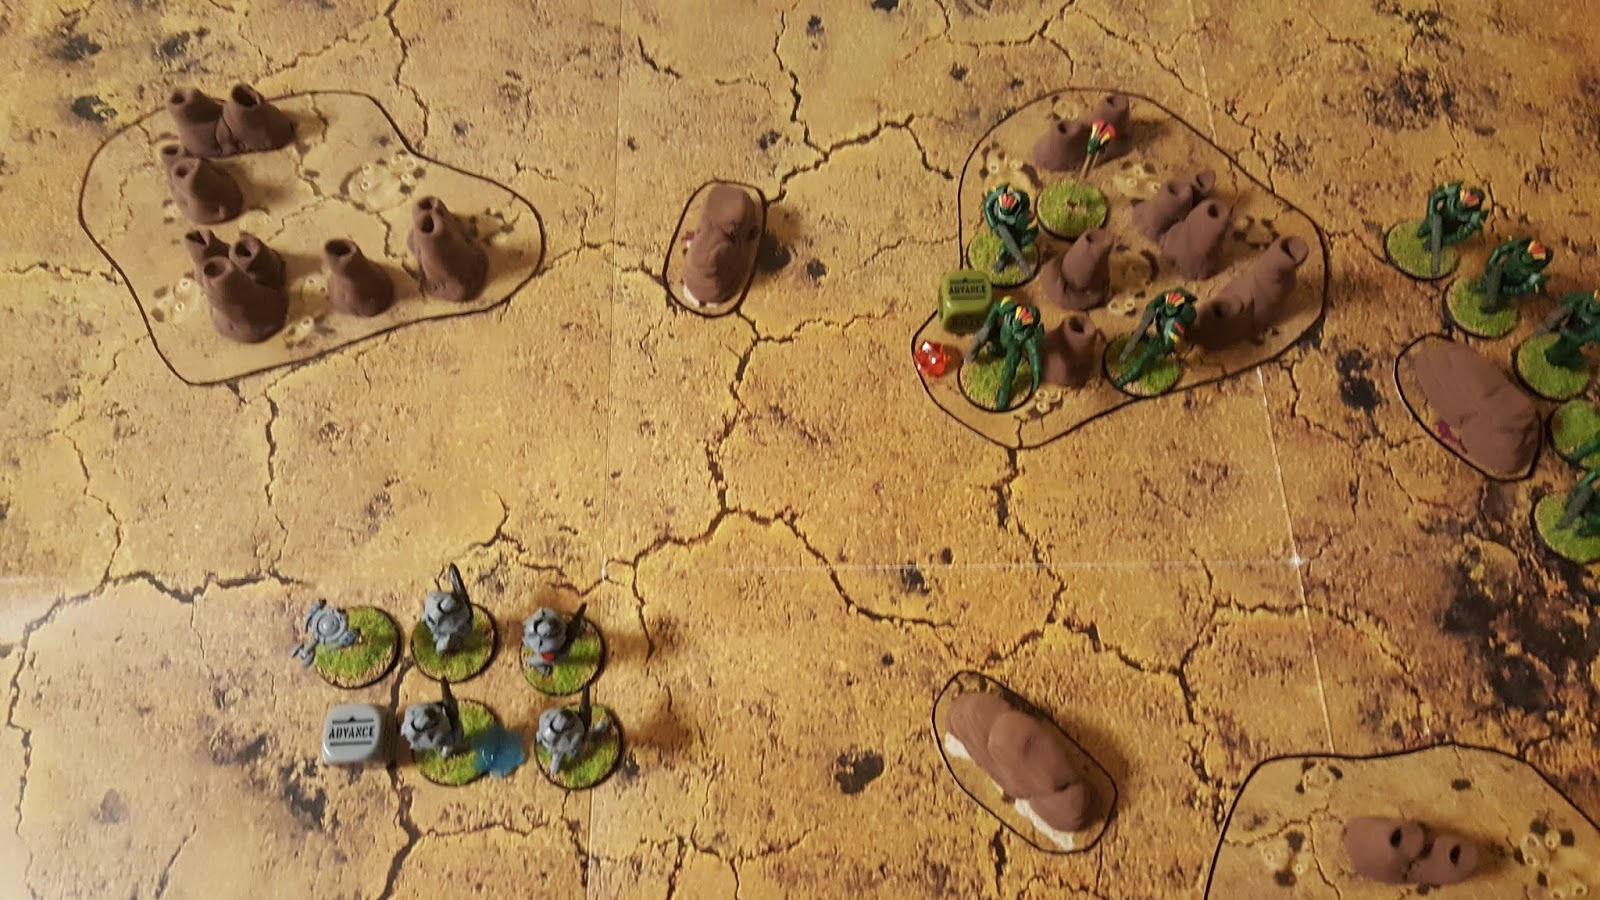
It was about this time that I had my first targeter casualty, as you can see in the bottom left corner of the picture.  It got snagged on my tape measure and decided to try to fly.  Never a good thing with those delicate flight stands.  And me with no super glue... ah well.

The Algoryn pulled the next two activations as well with the targeters moving forward and the central AI squad advancing into position behind the rocky barrier.  They opened fire on the southern strike squad but weren't able to get of a clean shot.  The Concord went next and moved their own targeters across the field searching for units to attach to.


The northern strike squad then ran forward into the dense scrub.  The Algoryn responded by moving into the rocky ground and opening fire on them.  Between their mag guns and the sling net ammo for the micro x-launcher, they were able to put two pins on the Concord troops but failed to pierce their armor.

Turn two opened with the Concord targeters locking onto their targets, the AI assault squad in the south...


...and the AI squad in the north.


Next the Algoryn lobbed another net round at the southern strike squad and again max out the pins, taking the unit to eight pins total.  This sends them heading to the hills even though the unit had yet to take any casualties.


The Concord command squad activated text and opened fire with the C3D1 following their lead.  The drone fires on the assault squad in the scrub but fails to drop any troops while the command troopers take out one of the nearby targeter probes.


The northern AI squad opened fire on the northern strike squad again but weren't able to get a clear shot.  The Concord returned fire, with their plasma bolts connecting but failing to penetrate their reflex armor.


The C3 command open fire with the light drone following suit yet again.  This time the AI assault squad goes down to try to get some protection for the plasma light support fire.  Even so the squad still gets hit twice but their armor is enough to keep them safe for a little longer.

The turn ends with the central AI squad advancing over the rocky barrier they were positioned behind as they try to get into a better position next turn.


Concord activates first for turn three with the northern strike squad firing on the northern AI squad.  Again they fail to drop any of the Algoryn but at least they were able to add another pin to them.


The central AI squad responds to this by advancing to among the rocks and firing back at the strike squad.  A lucky shot takes out their spotter drone but otherwise there is no effect on them.


Next the C3 command squad run forward with their loyal light support drone following along.  This puts them closer to the AI assault squad but they had failed the recovery test for their down order last turn.


The AI support squad moves next, running into position behind the rock barrier on the eastern side of the board.


The AI targeters moved next, getting into position and locking onto the C3 command squad.


And ending the turn, the northern AI squad fire on the northern strike squad and are even able to take out one of the troopers!


Turn four opens with the Concord command firing on the AI support team, scoring a lucky hit and taking out the spotter drone.  No more patch sighting for them!  Unfortunately they still aren't able to hurt the crew of the weapon.


Keeping form with the previous turns, the light support drone follows their lead and fires at the assault squad but even with the three targeters assisting it isn't able to score a hit.


The assault squad goes next, running charging forward to engage the command squad but just manage to fall short of the mark.


The northern AI squad activates next, firing on the northern strike squad again to much the same result; no casualties but they did rack up another pin.  This proves to be enough as the strike squad tries to activate next but is forced to go down instead!


The AI support team goes next but without any clear targets they just rally to lose their pin.  After this the other AI squad charges at the northern strike squad.  Even though they are down, they are able to take out one of the C3 troopers as they close and the remaining troopers break and run!


The turn ends with the Concord targeters moving, one group locking onto the support squad while the rest lock onto the assault squad again.


Going into turn five, the Concord are in a desperate position.  Having had the two strike squads break means they are only one unit from loosing the game while the Algoryn still have yet to loose a unit.  The tides of war are not with them though as the Algoryn activate first with the assault squad charging forward to attack the command squad.  Both units loose one trooper as they close but the assault troopers tear apart the Concord troops in the assault.


This breaks the Concord force and while I could have rolled to see if the game went for one more turn... well, there really wasn't much point.  The only unit that could actually do anything was the light drone but even then there was no way for them to win.

The curtain comes to a close on the campaign with the Concord having been soundly defeated by the Algoryn   In fact overall there was only one scenario that they were able to win out of the five.  Really bad track record but what was the cause?  In the last scenario the AI support team was very potent, taking out one full squad by themselves.  By comparison the light support drone only took out one of the assault troops over three turns of shooting which just goes to show just how dangerous the x-launcher can be.  As for the other scenarios it did feel like the C3 were at a bit of a disadvantage, especially in scenario four.  Still not a bad way to teach the basics of the game.

Up next, I think its time to build some more small forces and set them loose on each other.  For now I'm going to continue using my Concord and Algoryn forces but I've been assembling my Ghar and I have a possible proxy force for some Isorians as well.  I'm still limited for table space but you've got to work with what you have.  Until next time...

Thursday, May 23, 2019

Workbench: Dressing Up The Batter Template

Really quick post this time but I wanted to share.  Included in both of the Gates of Antares starters (Xilos Horizon and Strike on Kar'A Nine) include a full set of blue translucent plastic.  These look good enough but they have some cool etching in them so I decided to try to pick them out.  At first I did a mix of white and light blue but the lines were so subtle you had to be looking for it.  I'll admit that I was a little annoyed by this and maybe went a little extreme to find the solution.


Grabbing a handy dandy Wite-Out correction pen, I started following along the lines and quickly wiping way the excess before it dried.  It can be a little tricky because Wite-Out is made to dry very quickly but I am really happy with the results.  Gives it a crazy energy field look which I really like.

Short, sweet, and to the point.  Until next time...

Monday, May 20, 2019

Strike on Kar'A Nine Scenario Four: Drone Recovery!

With the C3 finally scoring a win with Scenario three, I was eager to see how they would fare in the next one.  As with all of the scenarios in Kar'A Nine, this one was objective driven but it really puts the pressure on the C3.  They need to reach a downed drone in the center of the board and then retreat with it in five turns and before the AI can destroy the drone.

The scenario opens with two strike squads deployed along the south western edge of the board while two AI squads are deployed in the opposite corner.  The objective for this one is the drone right in the center of the board.


The Algoryn on the eastern edge activate first, advancing forward behind the rock barrier and opening fire on the drone (the drone starts with the Down order and the rocks that are around it are just there to represent the crater it crashed it... no impact on the gameplay, just a visual).  The C3 is lucky as none of the shots connect with the crashed drone and it survives a little bit longer.


The closest strike squad activates next, running into contact with the drone so they can activate it.  This leaves them sitting in the open but there aren't any other options at the moment.


The second AI squad activates next, advancing and firing on the drone.  Unfortunately they hit the drone and take it out with their first volley.  So according to the rules for the scenario, that's all she wrote.  This seems kind of anti-climactic so I decided to change things a bit.  Since the drone was destroyed I decided that the C3 pulled the memory unit from the drone and needed to escape with it.  This kept things from ending quite so quickly.


The other strike squad is the last to activate this turn, advancing forward and letting loose some shots at the eastern AI squad to try to take some of the pressure off their comrades next turn.  Unfortunately they can't connect with any of their shots.


The AI get the first activation for the second turn and the eastern squad opens fire on the central strike squad, downing the lance trooper in the process.


Unfortunately for the Concord forces, the second AI squad activated next and they lay into the central squad again.  The squad leader and another trooper are both downed but the remaining trooper holds his ground.  He even hardens his resolve and moves over to grab the memory unit from his fallen comrade.


The second strike squad activates next, advancing forward and opening fire on the northern AI squad and dropping a couple of troopers in the process.


Turn three begins with the eastern AI squad opening fire on the central strike trooper, dropping him in a flurry of mag rounds.


The northern AI squad goes next, advancing into cover while they fire at the remaining strike squad.


The strike squad shrugs off the rounds and then advances forward, grabbing the data so they can try to escape with it.


The AI get the initiative again in turn four as the eastern AI squad opens fire on the strike troopers.  Again the shots bounce off their hyperlight armor to no effect...


But just the single pin is enough.  The strike squad fails their order check and are forced to go down instead of trying to get off the board with the unit.


At this point I called it thinking that it was turn five instead of turn four but it seems like the odds were really stacked against the Concord.  Could they have made it off the board?  Maybe... but they were facing two squads of AI while stuck out in the open...  so it's not too likely.

The odds were really stacked against the Concord right from the start with this scenario.  This made the whole thing that much more tense but I think I would change it if I ran it again.  Perhaps using two full strike squads would have helped balance things out a bit more.  That's only two more troopers but that could have been enough to tip the balance in this case.

For the final battle, the two forces pull out all the stops as they both launch all out assaults.  Kar'A Nine has a set force list and suggested terrain but I'm going to break out all the terrain I have on hand and actually build a couple of forces for the fight.  I'm limited on table size (roughly 2 1/2 feet by 3 feet) so I'm going to try to stay away from too many OH and long ranged weapons but we'll just have to see what I come up with.  Until next time...

Thursday, May 16, 2019

Workbench: More Terrain For Antares!

Over the weekend I decided to throw together some more terrain that I could use for the Kar'A Nine battle mat (or any other desert themed mat once I put one together).  They're aren't finished yet as I didn't do anything for basing but since I'm just looking to get in some quick games while I'm away for work these will work nicely.


The plants for these are two different types that I picked up years ago when I was doing demos for the Starship Troopers Miniature Game so I have no idea what they actually are.  I have looked around for more of them recently but I haven't seen anything like it up here in the northeast.  This isn't too surprising since plants like these aren't what you would typically see in these parts.  The bases are from Michael's and come already cut into the shape you can see.  For the larger shape they only have the circle (which is roughly 6 1/2" diameter in case you were curious) but I'm okay with this.  A terrain base that I can just pick up in the store and use?  Heck yeah!

Ultimately I want to do more of these to create terrain pieces themed for Yadrolla (aka a swamp/rainforest kind of feel) but that will have to wait a bit longer.  There are still some more battles to be fought on Kar'A Nine first!  Until next time...

Monday, May 13, 2019

Strike On Kar'A Nine Scenario Three: Surgical Strike!

For the third scenario, the Concord have finally located their downed drone and launch a counter attack to try to pull some of the Algoryn forces away.  This scenario also introduces the C3D1 light support drone which looks to be a nasty machine.  Equipped with a plasma light support, it has a strike value of -3, making it the most potent weapon so far in the scenarios.  It will be interesting to see just how it plays on the table but again I am actually going to use the full rules.  Normally weapon drones have their own damage chart that you roll on but Kar'A Nine just treats it as one hit and done.  Not bad for an introductory situation but I'm going to take my chances with the extra step.

The scenario opens with the AI deployed along the northern edge of the board while the C3 are deployed in the center of the opposite side.


The C3 get the initiative for the first turn and the strike troopers run forward into the pinnacles to get into cover.  The Algoryn activate next and the eastern AI squad moves up behind their closest cover, using it to block line of sight to the strike troopers and, more importantly, the light drone.


The second AI unit moves next and follows suit, also running up to use the closest cover to block the line of sight.


Finally the light drone activates, floating forward on its suspensor field to take position behind the strike squad.


Turn two the C3 get the initiative again as the strike squad advances behind the rocky barrier and open fire on the western AI squad.  Unfortunately for them the flurry of plasma only manages to take out one of the Algoryn.  As luck would have it this turns out to be enough as the same AI squad tries to activate next but fail their command check and hit the dirt instead.


The other AI squad activates next, moving into the rocks to get some protection against the drone and then opens fire on the strike squad.  Even with the strike squad in the open, the AI cannot pierce through their target's hyperlight armor.


The light support drone activates next, advancing forward and firing on the same AI squad.  The rocks provide some much needed protection though one of the AI troopers does fall to the incoming fire.


With the Concord forces getting close to the Algoryn side, the eastern AI squad charges forward to assault the strike squad.  Both sides fire as the AI close with their target and the C3 are able to take out one of the attackers on the way in.


Having come to grips the two units exchange blows with the AI winning the first round, killing one of the strike troopers.  The C3 are shaken by the fight but try to hold their ground as the Algoryn launch a follow up attack.  This time the strike troopers are not so lucky.  They survive the assault but it was enough to break their morale and send them running back to their own line.


With the strike troopers gone, the AI squad quickly falls back trying to take cover among the rocks as they brace for fire from the drone.  With its processors thinking slightly more clearly than the organics, the drone simply floats into the rocks as well and opens fire, gunning down one of remaining AI troopers and sending the other running.


Their numbers already reduced, the remaining AI squad moves into cover on their side of the board.  They open fire on the drone but the rocks keep them from getting in a clear shot.


The light drone acts first in turn four and runs to the northern board edge to achieve it objective and score a victory point.  The AI fire at it but aren't able to pierce its armor even in the open.  The two sides trade shots in following turn as well with the drone taking out two of the AI troopers but the final trooper manages to get a lucky shot off that scrambles it systems and destroys the machine.


The scenario ends with the C3 just barely scoring a win.  While they didn't manage to lure the Algoryn reinforcements onto the field, they were able to reach the northern edge which is just enough.  The light drone is something to be reckoned with just due to the sheer volume of armor piercing fire it can lay down.  While more heavily armored than regular strike troopers, in the end all it took was a little luck to pierce it armor and take it out of the game.  Assaults are also a very deadly affair in Antares.  It was a desperate move for the AI to attack the strike troopers since they were outnumbered but it paid off in the end.

In the next scenario, the C3 try to use the momentum they have finally gained and recover a damaged drone as AI squads are closing in.  Can they activate the drone and escape without sustaining any losses?  We'll just have to see.  Until next time...