DriveThruRPG.com

Wednesday, October 30, 2019

Workbench: Two Habs And A Landing Pad

I was able to get some more work done on the outpost and though its been slow and steady, I really like how it's pulling together.  The changes that I made splitting the adhesive foam sheets along the corners is working well.  I'd been concerned about the gap between the joins in the foamcore being an issue but it has been working out very well.  As I mentioned, hot gluing it would be an option so that I could keep the foam sheet in one piece but its one that I'd prefer to avoid if possible.  So far so good, but I still plan on pacing myself so I can adjust my methods as I move forward.


Though a transmat will form the hub of the outpost, it only makes sense to have a landing pad as a backup and it's also a nice visual element.  I'd thought about leaving the surface of the pad plain but it covers such a large area so I'm glad that I decided to break it up instead.  It would be easy enough to put some scatter terrain such as crates on it but the seams and repairs on it help to keep the surface visually more interesting.  The platform itself is also raised up on a hill and the barrier along the edge gives cover, making it a good objective or defensive position.


I also put together most of a second extra hab pod.  For this design, I decided to go with a longer pod and place the door in the side of the unit instead of the end.  Overall I'm really happy with how it turned out though I still need to add a roof.  Eventually I will probably add more details but for now it gives me a very serviceable building to add to the board.

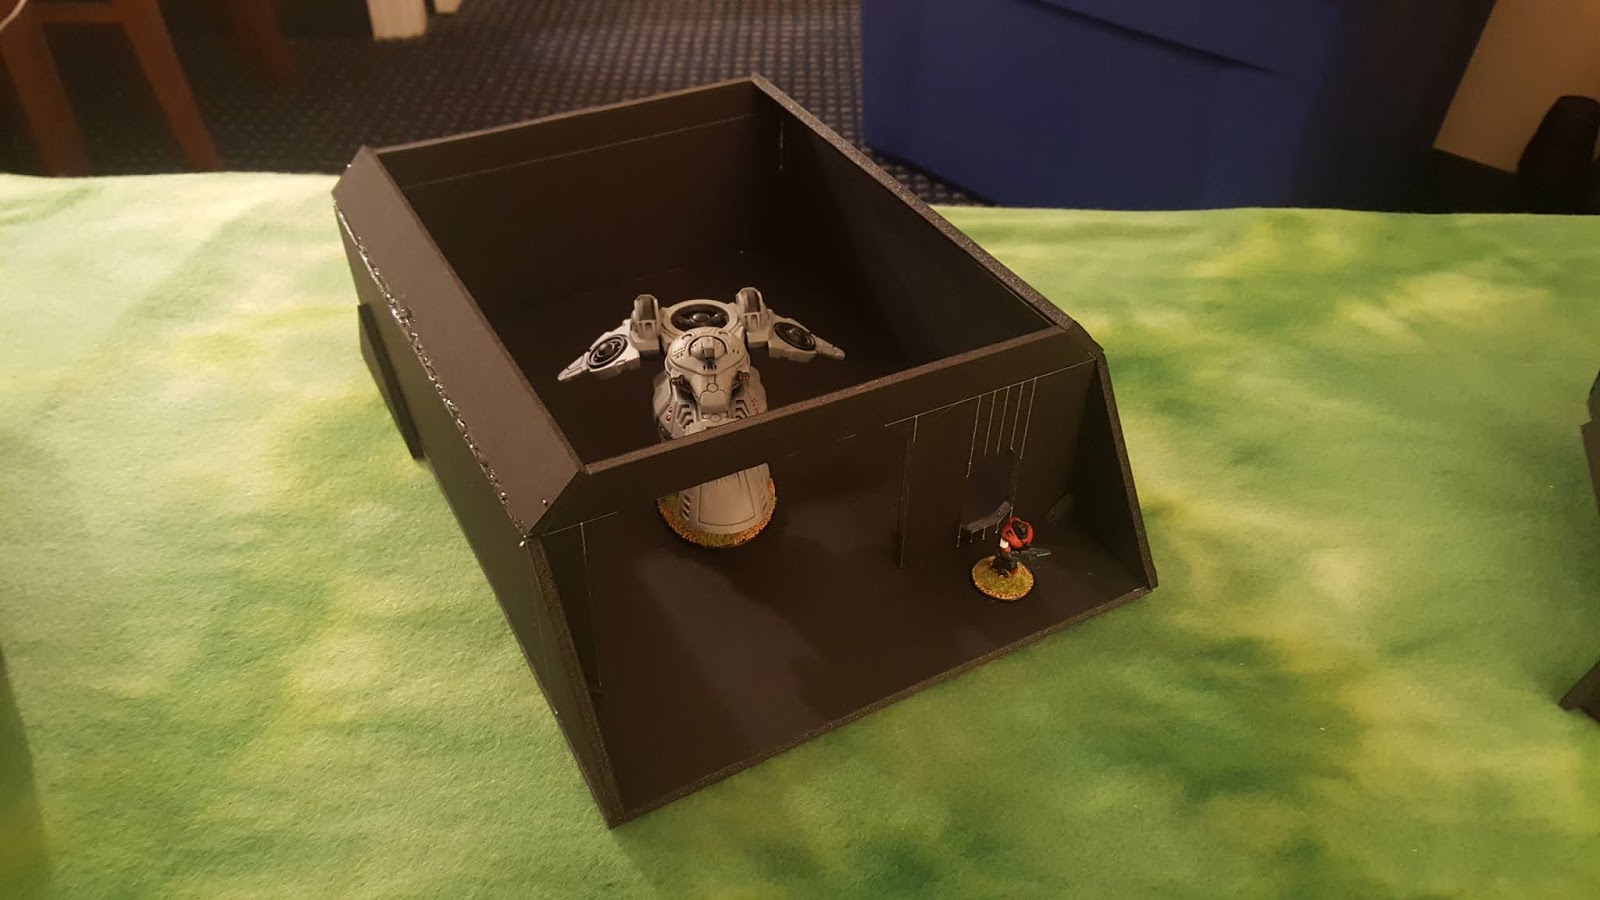
The warehouse/hanger and a second long hab unit are still in progress but as I mentioned before I'm trying to refine my methods on each piece instead of rushing in headlong.  In the past I've gotten too ambitious and found that my methods weren't working as I'd hoped, ultimately discouraging me and then I just walk away from the whole project in frustration.  Going with this slower route, its letting me identify and correct problems as I go.  This is definitely more time consuming but I feel like the end results are really paying off.  Until next time...

Wednesday, October 23, 2019

Workbench: Slightly Delayed Small Hab Update

(Dispatcher note: This post was supposed to go up on the 23rd... so I left it with that date.  There is more coming soon. Enjoy!)

As I feared, the adhesive on the foam sheet wasn't strong enough to hold on the corners.  It was an easy fix as I just pulled back the foam along the length of it and hit it with a quick shot of hot glue.  Definitely stuck now though I've changed my methods on my next piece, but first...


Here is the painted small hab, complete with roof even!  I'm thinking I might go back and hit it with some graffiti or other markings but for now its usable.


I just left the interior as a gaping black void but with the abstract way that units in buildings are handled in Antares, this shouldn't be an issue.  That said, I think it would be pretty easy to add a removable interior if I wanted to but that can wait for now.


Overall I'm happy with the design and they have been fairly easy to pull together.  I still have a number more to make for my Freeborn outpost (maybe half a dozen or so?) but I think they will look pretty cool once they're done.  As an added plus, I'm going to be leaving them separate pieces so they will be very flexible for terrain set up.

To go back to the changing method that I mentioned before, I decided to try cutting the bent plates along the edges into two pieces instead of wrapping it around.  Given the gap along the edges, I was worried about how well they would adhere but so far it has been working fairly well.  No pics yet but either later this week or next I will have at least a grey dry brush on it which will make the details easier to see instead of the matte black foamcore.  Until next time...

Monday, October 21, 2019

Workbench: Small Hab Detailed And Base Coated! Huzzah!

Over the weekend I grabbed some of the adhesive foam sheets I'd mentioned last week and got to work on adding some details.  The material is just the right thickness that it adds some depth to the structure without being too exaggerated.


I am concerned about how well the adhesive will hold on some of the pieces so I'll have to take a look tomorrow to see if there is any lifting.  Even if there is, the fix is to just hit it with a hot glue gun but I'm hoping that the regular adhesive is going to be strong enough to do the job.  Even so, I'm not the patient sort so I threw some paint onto the small hab unit to see how it took and I'm really liking it so far.


The structure is much easier to see with some paint on there to give contrast.  I was also able to skip the step of undercoating anything by just using black materials which made the whole process much faster.


I am going to go back and add some more painted details to this piece to give it a little more personality but structurally it is good to go... well, except for the roof of course.  Very basic compared to work by other people but I think it will do the job nicely and ties in well with the style for the rest of my terrain.  Beyond this piece, I have also started finishing off the landing pad and warehouse though I want to see how the adhesive holds before I get too carried away with them.  More on those later this week.  Until next time...

Thursday, October 17, 2019

Workbench: Building A New Frontier

Tuesday I read through an interesting article on the Antares Nexus about the different architectural styles common to the various factions.  I'd read this before but this time it really clicked for me. Within fifteen minutes I had an idea for a Freeborn outpost and within half an hour I had already started sketches and construction.

The basic idea for the outpost was somewhat inspired by the idea of Mos Shuuta from the Edge of the Empire adventure, Long Arm of the Hutt.  For those not familiar, Mos Shuuta is basically the base of operations for one of the lesser known Hutts, Teemo the Hutt.  The town itself is a small compound with Teemo's palace, a couple of docking bays, and a small town that has grown around these.  With that kind of an image in mind, I quickly sketched out a rough layout for my own Freeborn outpost.

In this case the center of the outpost would be an open plaza with a transmat in the very center.  This space would serve several functions within the outpost, from being a market for goods to a rallying point for troops.  Arrayed around this space are the rest of the structures, providing shelter from the elements and acting as a barrier to protect the transmat.  As a backup for moving goods and people in and out of the outpost, there is also a large raised landing platform.


This pad is large enough to accommodate a shuttle and also has a wall around its perimeter, allowing it to also function as a defensive position.  Construction of this piece was very simple since it is basically a flat surface but I also decided to add the ramp and exterior walls just to make it more interesting visually.  There are also some details made from off cuts that I used to decorate the edge of the wall just to give it a bit more of a pop.

The next building I decided to tackle was the warehouse/hanger.  This is another large structure that also features a large door in the front to allow cargo or even vehicles to be moved in or out of it.


The largest vehicle I own currently is the C3T7 and that fits through with room to spare so I think that most of the other vehicles should be able to fit through as well.  Again I grabbed some of the interesting off cuts that I had lying around after cutting out the pieces and used those to add some surface details to the structure.

With those two major features out of the way, I decided to focus on some of the habitation modules I would use in the outpost.  The concept is that most of the buildings are basically repurposed pods which made things easy once I worked up a basic design concept.


In addition to being used for the hab centers, I am also going to build a couple of the larger units to use as domari and vardinari barracks.

The final piece for the outpost (other than the transmat of course) will be the manor house of the vard.  This will be the largest piece in the outpost and will have multiple levels as well, making it the defensive heart of the outpost.  This one is still more of a concept at the moment but I am going to follow the container theme that I have been carrying through, just making it a bit more elaborate is all.

So far I'm happy with how these are coming out though there is the issue of the seams between the plates.  I tried using hot glue to fill the valleys but once they dried they became quite concave.  Instead I want to pick up some adhesive foam sheets to use for various details, in particular as angle pieces running along those corners.  That should make them look a lot cleaner structurally and using the foam should let me quickly add some details to the various buildings.  Then I can start hitting these with paint and I think that will really make them pop, but more on that next week.  Until next time...

Saturday, October 12, 2019

Random Updates: The Mass Is Effecting Me!

Just kind of place holder post here as Mass Effect 2 ate up a chunk of my free time this past week.  I'd forgotten it was on my laptop until last week and I just wound up diving right into it.  Going heavier on the paragon path than I did the first time I played the game just too see the difference.


I also watched season one and two of One Hit Die on Amazon Prime... which apparently are actually seasons two and three?  Hmmm...  Apparently there is more to watch this week.  Well, the two that I watched were Legend of the Lich Lord and the Devouring Dungeon.


They describe themselves as Lord of the Rings meets the Office which I guess I can see though I have pretty limited experience with the Office (I might have to give it another try).  I found foth of the One Hit Die movies/series were pretty amusing and if you like things like the Gamers series, I'd definitely recommend checking it out.

This doesn't mean that there was no hobby this week, just much less than I had expected.  More progress was made on my hills plus I brought down more forest material that I'm going to redo.  The original pieces are from years ago and had a tree hot glued in the center of a CD. I'd done this to create small woodland area terrain but I prefer the newer style I've been doing with the tree being on its own base.  This makes it a bit easier to play around as you can move the tree on the woodland base so that it's out of the way or even just remove it if need be.  This also lets me make denser terrain pieces since the terrain elements themselves are removable and don't limit game play.

I'm also still organizing things as far as storage and it's slowly getting there.  Since I'm effectively living out of a hotel right now, it does create some interesting new challenges but overall I think that things are coming together slowly but surely.  The next step is getting out and exploring locally to check out the local game stores in the Boston area... which means suffering through afternoon traffic.  I've seen worse (I'm looking at you Ohio!) but it can get pretty tedious.  "Wow, it's only two miles away!  I should be there in about 30 minutes."

Thursday, October 3, 2019

Workbench: The World Is Taking Shape

My plans for more painting have been temporarily put on hold (It's all your fault Shepard!) but the terrain has been coming along very well. Here is a shot of the 4' x 4' board with a variety of terrain laid out to give you an idea.


I even played another solo game to try this mix out.  Algoryn vs Concord in a 500 point skirmish game.  Algoryn won again thanks to their dirty x launcher.  "You get a pin and you get a pin and you get a pin!"  Still fun and good to keep the rules fresh in my mind.  It also inspired me to make more hills.  How many more?  Well...


About this many.  As you can see a good chunk of these are still in progress but I should be able to get them finished up next week.  I'm also going to grab some of my old forest terrain from home over the weekend and re-base it so that it matches up with what I'm currently using.  Slowly but surely making progress... as long as I can keep from playing too much Mass Effect 2.  Until next time...