DriveThruRPG.com
Showing posts with label terrain. Show all posts

Saturday, August 28, 2021

Terrain Review: Kaldstrom Scenery Expansion Pack

I did a review of the first pack, so I might as well do the second one as well, right?  The Kaldstrom Scenery Expansion Pack adds onto the terrain that comes in the base pack... makes sense given the name.  Unlike that set, this one comes with some different options which I think make it worth taking a look at.


As with the base pack, the expansion also comes with two of the smaller buildings done in the same format; double sided to give you options but these ones are a little bit taller.  They do have a similar footprint to the small buildings from the base pack but I do like the varying height.


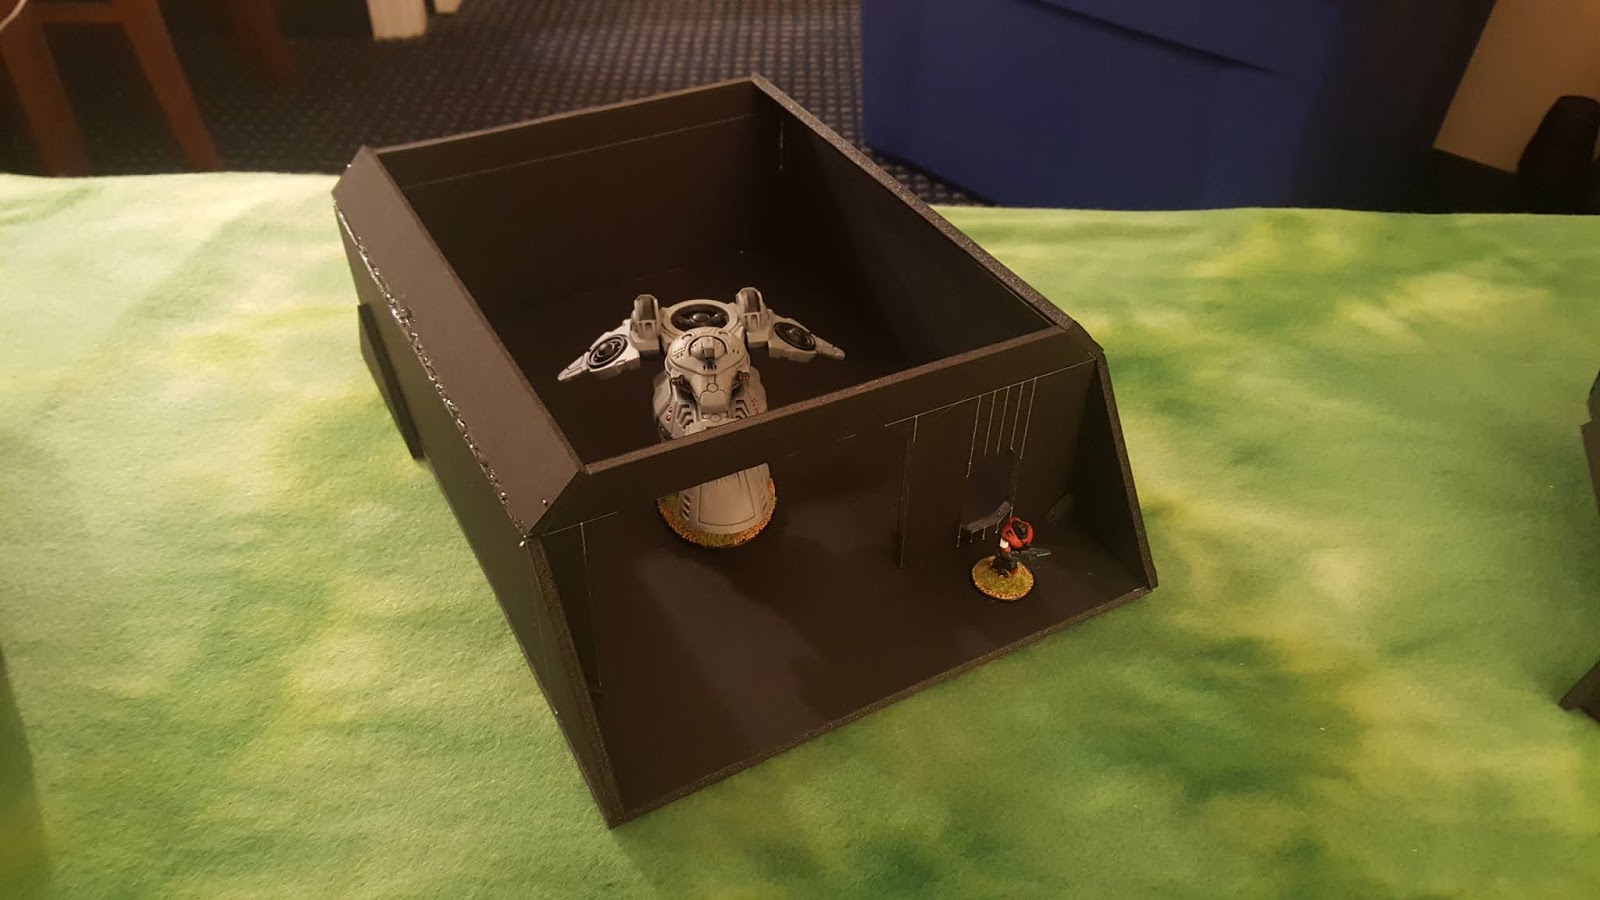
And that is the point that the similarities between the two packs ends.  Instead of the two large buildings, the expansion give you one extra large building that can be set up either with a roof or as an open topped building with a walkway.  Unlike the other terrain, the fit on this one is looser so it might be something that I try converting back and forth as needed, depending on how snug the walkway makes things.  Even so, I really like that it adds a third building foot print to the mix, giving you even more variety.


Next up are the stairs and bridges.  These pieces are designed to clip right over the ledge on the top of the buildings but they don't have a specific location that they connect to which continues the trend these sets have of giving you some flexibility in their set up.  The bridges also come with pieces that go on the end so you can also use them as stand alone features.  Got a small river or chasm you need to cross?  Instant foot bridge!  As with the buildings, all of these are very sturdy in both material and construction which is great.


Unlike the base set, this one comes with almost no scatter terrain.  In fact, there is only one piece, a console of some kind, but combined with the other set I don't really see that as much of a detriment since that one comes with so much.


Finally there is the elephant towering over the room, by which I am literally referring to the tower.  I like this piece since it really adds a new dimension to the field.  It also has a staircase that gives you access to the top so you could even do some kind of running battle up the stairs if you wanted, as long as you don't mind going in single file.


As you can see, combining the two sets makes a board with a pretty good amount of cover.  If anything it might be a little cluttered for my 2' x 3' board but you get the idea at the very least.  As for the appearance, I like the aesthetic of the whole thing, and the two sets give a nice variety of structures as well.  Now all of this sounds great, but once again there were some issues.  The instructions are just as vague with this set, and though the pieces were very similar, it seemed like they were harder to get together this time.  On top of that, some of the pieces are really, really loose, to the point that they fall apart when you pick them up.  This is easy to fix by just hitting them with some glue, it just seemed kind of odd since the other set went together so well.

Even with these minor gripes, I'm happy with this purchase.  These two sets give me a bunch of sci-fi themed building that I can throw down and pick up really fast, and the printed designs mean that I can easily transport them since there are no fiddly bits to snag and break off.  And you can expect to see these two sets again soon.  I head back out into the field next week and these are coming with me in my hobby kit, not to mention about half a dozen single player board games that I've added to my collection, but more on those later.  Until next time...

Friday, August 20, 2021

Terrain Review: Kaldstrom Scenery Pack

A couple of weeks ago, I saw images of the Kaldstrom scenery pack and it quickly peaked my interest.  I purchased one of the original Corvus Belli scenery packs, the Kurage Station scenery pack, and it wasn't bad.  The Kurage Station pack is made up of basically flattened, pre-printed boxes that you fold out into some buildings, storage containers, and walkways.  It was dirt cheap and not bad as far as quality, but it lacked any weight.  Knock the table just right and I was worried about minis going flying so I didn't use it that often.  With the Kaldstrom pack, Corvus Belli has gone in a different direction and in my opinion the end result isn't bad for what you get.


Unlike the Kurage Station pack, the Kaldstrom pack is made out of a very thick cardboard.  Think Battle Systems terrain and you are close, but I think this material is actually a bit thicker.  Printed on both sides, it is designed to give you different options when you assemble them, plus you can take them apart, flip the parts over, and instantly have some different terrain.  Not a bad concept in theory, but in practice?  Not so much.


Where the Battle Systems terrain has a finish on them, the Corvus Belli terrain doesn't which makes it a little more delicate when are assembling it.  Since this is all done with slots and tabs, you do need to be careful as you assemble it otherwise the board quickly start to breakdown and the layers break apart.  The instructions also aren't very clear as there isn't a suggested order of assembly to put it all together without having to resort to a bit of brute force.  To be clear, I was able to assemble all of the terrain pieces once without any serious issues but there is no way I'm going to take them back apart.


The resulting buildings are very solid and I think they could easily support the weight of even a good sized metal mini with no issue.  They also come in two different sizes so you can actually stack one of the smaller ones on top of a larger one to give yourself another story.

The set also comes with a good number of barriers, holoads, and display boards, giving you a nice mix of scatter terrain.  These bits were a big reason that I decided to bite the bullet and give it a go, as I can easily incorporate these parts into something like Core Space for some different cover options.  There are also a good number of tokens for use with Infinity but you can easily find ways to corporate them into other games as well.  The most numerous are order tokens which I can see being used as blips like in Space Hulk.


Overall, I like this set and I can see it getting use in the future.  I was looking for a cheap alternative to scratch built terrain and I think that this fits the bill.  Perhaps not the most varied of terrains but it was ready to go pretty quickly so that works for me, and as you can see from the pictures, it doesn't look half bad with some other terrain to mix things up.

There is also an expansion pack that includes two more small buildings, a much larger open topped building they list as "an objective room", some bridges and ladders, and even a sniper tower.  This one is currently on order, but with these two sets I'm thinking I should be able to get decent coverage for a 4' x 3' table which is the biggest I'd be playing solo on.

So the final verdict?  I don't think it's a bad value for the money.  Retailing at $36 each, I managed to get both for just over $50 which I don't think is too bad a price.  The pieces are double sided so in theory you can rebuild them to have a different facade, but I think that the wear and tear on the edges of the material would quickly make them impossible to get together.  Could I make something similar myself?  Absolutely, but then again when you figure in the materials and more importantly the time to do it, I think I came out ahead in this situation.  This doesn't mean that I'm going to stop making terrain, but it's good to have an option for some terrain that I can just grab and throw onto the table.  Until next time...

Saturday, March 27, 2021

Workbench: Digital Ghosts In The Zona Alfa Floral Department?!?

Wow have I been crazy busy, at least in my free time.  Our 5e game has transitioned over to Roll20 so I needed to learn the basics of not just playing but DM'ing with their system in last week and a bit.  Add to that my decision to make JPEG maps of some of the locations since I've gone completely off the rails from the written Ghosts of Saltmarsh game and yeah, not a lot of free time.

That said, I'm quite happy with what I was able to cobble together using a pdf program in such a short time.  Here is the first floor of the Sutton estate that my players psycho-pumped.


Unfortunately the 2nd floor and basement didn't look quite as finished as all the details I was adding were really bogging down the program I was using, but I'm still really happy with them overall.  I am looking at getting a Pro subscription to Inkarnate.com so I can do more work for the campaign... and because it just generally is kind of fun.  Crazy, I know, but I'm looking forward to bringing more of this game to life using the digital tools that are out there.

Of course this means that I've had no time for physical painting, but I'm okay with that.  Hobby is hobby after all, and I'm really enjoying running our insane little corner of the world.

This doesn't mean that there hasn't been any hobby though as I've stumbled on some great bits I'm going to use for some terrain pieces.  A week or so ago, I stopped by Hobby Lobby to grab some canvases for my daughter and decided to swing through the floral section just to take a looksee.  I've got a lot of regular terrain, but I was looking for something more alien.  Zona Alfa has recently caught my eye and I've been had some ideas stewing in my brain for some terrain pieces to build.  I wasn't holding out much hope though since this was a craft store so imagine my surprise when I found these little gems!

These two were the first that really jumped out at me.

People have done some pretty cool prints for anomalies but since I'm 1) lacking a 3d printer and 2) always looking for the cheap option, these seemed like they might work.  As I explored some more, I had some other options catch my eye so I might just use them as alien plants instead since they would tie in nicely.

The next two were these, with colors inspired by the first ones.

I can see these being scattered around as ground cover, bizarre little growths that are overrunning our native vegetation.  Or I could group some of these together on a base to create a zone hazard that could be encountered.

Next was this one which just looks bizarre.

As an added plus, the piece is also really long.  The crazy bubbly stems are over a foot long and there are at least a dozen of them on one plant.  It might be tricky to cut them down without having the bare stems exposed but I'm willing to give it a try to see what I can make.

The final one is a doozy!

I have already made a carnivorous plant but the center looks pretty floral.  This one looks far more dangerous, almost like some kind of gigantic land anemone.  I can see this fitting in perfectly as a "creature" for Antares.  Some great finds, especially since I really wasn't expecting them.  Now I just need to start making some structures as well so I'll have somewhere to explore.  So many projects, so little time.  Oh well, at least I shouldn't get bored in the next few years as I work my way through all of these!  Until next time...

Monday, December 28, 2020

Core Space: Set Up Dry Run and Some Initial Thoughts

Since I have all the bits and bobs punched and assembled for Core Space, I decided to give it a dry run on to set up for the example mission, Salvage Run.  Start to finish took me about 30 minutes give or take just for the board, which isn't bad considering how nice it looks.


There were a couple of things that weren't initially clear in the rulebook (the doorways vs. the openings for example are pretty similar) but overall it was pretty smooth.  Other than that little hiccup, everything seemed to be clearly labeled and went together smoothly.  And the end result?  Honestly it looks really sharp!


I haven't punched out the doorways or window, and probably should for LoS purposes but I was thinking I might just do that in game.  I was hoping to squeeze in some play through as well but life returned to normal, so I needed to run some chores before everyone got moving.  This did give me an idea of the total room need though and I think I will be able to clear enough space on my larger hobby table to do a full set up.  Might be a little tight, but it would give me another reason to tidy up my hobby space some more.  Things have gotten a bit messy... oops!

I have a couple of observations though that I thought I would share for anyone looking at taking the dive into Core Space.

Terrain

The build for the Salvage Run scenario uses literally all of the scenery; walls, tables, crates, you name it.  While this might be seen as a red flag, it really does give a nice and dense play space without being too crowded.  Battle Systems makes quite a few other sci-fi sets besides the expansions for Core Space, so I can see that expanding this would be very easy and really not that expensive all things considered.  Could I make a bunch of scenery like this that was modular and looked cool?  Sure, but no where near as quickly as punching and assembling this terrain has been.  And this stuff is very sturdy as well.  I also recently picked up their Fantasy Village set and after assembling several pieces of that, this stuff has a nice solid feel to it.  No, you can't walk on it or anything ridiculous but just holding the pieces you can tell that they are of a solid construction.  There are also a lot of ways to customize the Battle Systems terrain just with all the scatter bits they include.

Class boards

The base game comes with eight class boards, and I know that the deluxe rules let you create your own characters but I never saw a breakdown of which classes were in the base game.  So here they are.

Crewman/Augmented (x2)

Crewman/Soldier (x2)

Crewman/Hunter (x2)

Tech/Support (x2)

Seems like a pretty good mix though I'm curious what other ones come in the various crew packs.  Looking in the deluxe rulebook, it looks like there is also a Merg and machine class board which should come in the Yamato and Skylark crew expansions respectively, though I'm curious what other combo are included.  I was worried about there being enough of a mix but I think the way that they handled it should spread out nicely, especially once you add in a crew or two onto what it in the base game.

Overall, I'm really happy with this purchase and I can't wait to actually get a game in.  From what I've seen and read, it looks like Core Space does a great job balancing between being a miniatures game and a light role playing game which is just what I've been looking for.  Until next time...


Thursday, November 21, 2019

Workbench: It's Harvest Time!

I sat down and cracked out some more terrain pieces and the outpost is really coming together.


In particular I like how the farms have turned out.


The crops are mounted in groups on bases so they can be removed to make positioning minis easier.  I was going to mount the plants individually but decided that doing rows of plants would be more easier to make and move around as well.


I also finished the roofs for the small and large hab units which really tied these pieces together nicely.  I'm still debating on signage for them but for now they are good.


Speaking of signs, I did put the Porta-Mat sign on the back of the transmat and then dirtied it up some.  A pretty minor thing but I like how it breaks up the flat surface on the backside.

Of course you can't have a farm without having an old farm truck.


Nothing too fancy but I thought it would be a fun touch.  On the back is one of the storage containers I'll be putting together.  For those who might not recognize it, it's the case that replacement blades for a Harry's razor come in.  I had been thinking about adding some plastic card to it but I might just slap a coat of paint on it to see how it looks.

I still have some more buildings to get painted but I'm going to finish those off next week.  That said I really like how it is all coming together from a visual point of view and the overall density of the cover as well.  Having things to break up line of sight is important in Antares and I'm looking forward to push around some miniatures again soon.

I need to pick up some storage totes to better store and transport my pieces but then I'll be shifting gears back to working on my minis.  It's been a couple of months now but I think that this has been a really good break for me.  Now the question is which faction should to look to expand first...  Until next time...

Thursday, November 14, 2019

Workbench: Beam Me Up Imtel!

Short week this time but I was able to throw together the transmat for my outpost.  I was even able to get some paint on it as well.  Behold the latest tool for the up and coming colony outpost, the Porta-Mat!


I followed through with the cargo container concept (it's the new C3 everybody!) but this time there was a slight twist.  Instead of having it as a refurbished container, my idea was that this unit could be dropped onto a planet and quickly unfolded into a functional transmat.

I have also picked out the "crop" for my container fields but I left some of my materials back at home so those will have to wait until next week.  Slow but steady progress is still progress after all.  Until next time...

Thursday, November 7, 2019

Workbench: Babylon Binge And The Outpost

This week has been all about Babylon 5 and working on my outpost.  Normally I think I'd feel guilty about sitting down and watching a 23 episode season of a TV series in three nights but this time, I feel like I've been really productive.  In fact, here is what I've done this week for my Antares outpost.

The outpost buildings along with other terrain pieces I've been working on.
As can be seen, I still need to get paint onto most of the pieces but they are all fully constructed complete with roofs.  As I've mentioned before, there are no interiors for these buildings but I should be able to make some modular units that I can slide into the units if I really wanted to.  Thankfully the rules for buildings in Antares are kind of abstract so the interiors aren't needed.

Beyond the buildings that I've already touched on, I came up with couple of new pieces in the form of a contained field of crops.

Some friendly Ghar coming in town for the farmer's market.
I'd originally seen these as going onto the second level of one of my hab clusters but for now I'm using them as free standing pieces.  I also added a piece of foam core along the bottom of that I can use for "soil" although it would be easy enough to swap it out for another function as well.  Ultimately all of the hab modules are meant to be... well, modular.  The idea is that they can be positioned in a number of different layouts and environs.  Really trying to maximize how functional it is.  It's going to be an extended long weekend for me, but I'll have to see how much I get painted once I get back out here.  Until next time...

Wednesday, October 30, 2019

Workbench: Two Habs And A Landing Pad

I was able to get some more work done on the outpost and though its been slow and steady, I really like how it's pulling together.  The changes that I made splitting the adhesive foam sheets along the corners is working well.  I'd been concerned about the gap between the joins in the foamcore being an issue but it has been working out very well.  As I mentioned, hot gluing it would be an option so that I could keep the foam sheet in one piece but its one that I'd prefer to avoid if possible.  So far so good, but I still plan on pacing myself so I can adjust my methods as I move forward.


Though a transmat will form the hub of the outpost, it only makes sense to have a landing pad as a backup and it's also a nice visual element.  I'd thought about leaving the surface of the pad plain but it covers such a large area so I'm glad that I decided to break it up instead.  It would be easy enough to put some scatter terrain such as crates on it but the seams and repairs on it help to keep the surface visually more interesting.  The platform itself is also raised up on a hill and the barrier along the edge gives cover, making it a good objective or defensive position.


I also put together most of a second extra hab pod.  For this design, I decided to go with a longer pod and place the door in the side of the unit instead of the end.  Overall I'm really happy with how it turned out though I still need to add a roof.  Eventually I will probably add more details but for now it gives me a very serviceable building to add to the board.

The warehouse/hanger and a second long hab unit are still in progress but as I mentioned before I'm trying to refine my methods on each piece instead of rushing in headlong.  In the past I've gotten too ambitious and found that my methods weren't working as I'd hoped, ultimately discouraging me and then I just walk away from the whole project in frustration.  Going with this slower route, its letting me identify and correct problems as I go.  This is definitely more time consuming but I feel like the end results are really paying off.  Until next time...

Wednesday, October 23, 2019

Workbench: Slightly Delayed Small Hab Update

(Dispatcher note: This post was supposed to go up on the 23rd... so I left it with that date.  There is more coming soon. Enjoy!)

As I feared, the adhesive on the foam sheet wasn't strong enough to hold on the corners.  It was an easy fix as I just pulled back the foam along the length of it and hit it with a quick shot of hot glue.  Definitely stuck now though I've changed my methods on my next piece, but first...


Here is the painted small hab, complete with roof even!  I'm thinking I might go back and hit it with some graffiti or other markings but for now its usable.


I just left the interior as a gaping black void but with the abstract way that units in buildings are handled in Antares, this shouldn't be an issue.  That said, I think it would be pretty easy to add a removable interior if I wanted to but that can wait for now.


Overall I'm happy with the design and they have been fairly easy to pull together.  I still have a number more to make for my Freeborn outpost (maybe half a dozen or so?) but I think they will look pretty cool once they're done.  As an added plus, I'm going to be leaving them separate pieces so they will be very flexible for terrain set up.

To go back to the changing method that I mentioned before, I decided to try cutting the bent plates along the edges into two pieces instead of wrapping it around.  Given the gap along the edges, I was worried about how well they would adhere but so far it has been working fairly well.  No pics yet but either later this week or next I will have at least a grey dry brush on it which will make the details easier to see instead of the matte black foamcore.  Until next time...

Monday, October 21, 2019

Workbench: Small Hab Detailed And Base Coated! Huzzah!

Over the weekend I grabbed some of the adhesive foam sheets I'd mentioned last week and got to work on adding some details.  The material is just the right thickness that it adds some depth to the structure without being too exaggerated.


I am concerned about how well the adhesive will hold on some of the pieces so I'll have to take a look tomorrow to see if there is any lifting.  Even if there is, the fix is to just hit it with a hot glue gun but I'm hoping that the regular adhesive is going to be strong enough to do the job.  Even so, I'm not the patient sort so I threw some paint onto the small hab unit to see how it took and I'm really liking it so far.


The structure is much easier to see with some paint on there to give contrast.  I was also able to skip the step of undercoating anything by just using black materials which made the whole process much faster.


I am going to go back and add some more painted details to this piece to give it a little more personality but structurally it is good to go... well, except for the roof of course.  Very basic compared to work by other people but I think it will do the job nicely and ties in well with the style for the rest of my terrain.  Beyond this piece, I have also started finishing off the landing pad and warehouse though I want to see how the adhesive holds before I get too carried away with them.  More on those later this week.  Until next time...

Thursday, October 17, 2019

Workbench: Building A New Frontier

Tuesday I read through an interesting article on the Antares Nexus about the different architectural styles common to the various factions.  I'd read this before but this time it really clicked for me. Within fifteen minutes I had an idea for a Freeborn outpost and within half an hour I had already started sketches and construction.

The basic idea for the outpost was somewhat inspired by the idea of Mos Shuuta from the Edge of the Empire adventure, Long Arm of the Hutt.  For those not familiar, Mos Shuuta is basically the base of operations for one of the lesser known Hutts, Teemo the Hutt.  The town itself is a small compound with Teemo's palace, a couple of docking bays, and a small town that has grown around these.  With that kind of an image in mind, I quickly sketched out a rough layout for my own Freeborn outpost.

In this case the center of the outpost would be an open plaza with a transmat in the very center.  This space would serve several functions within the outpost, from being a market for goods to a rallying point for troops.  Arrayed around this space are the rest of the structures, providing shelter from the elements and acting as a barrier to protect the transmat.  As a backup for moving goods and people in and out of the outpost, there is also a large raised landing platform.


This pad is large enough to accommodate a shuttle and also has a wall around its perimeter, allowing it to also function as a defensive position.  Construction of this piece was very simple since it is basically a flat surface but I also decided to add the ramp and exterior walls just to make it more interesting visually.  There are also some details made from off cuts that I used to decorate the edge of the wall just to give it a bit more of a pop.

The next building I decided to tackle was the warehouse/hanger.  This is another large structure that also features a large door in the front to allow cargo or even vehicles to be moved in or out of it.


The largest vehicle I own currently is the C3T7 and that fits through with room to spare so I think that most of the other vehicles should be able to fit through as well.  Again I grabbed some of the interesting off cuts that I had lying around after cutting out the pieces and used those to add some surface details to the structure.

With those two major features out of the way, I decided to focus on some of the habitation modules I would use in the outpost.  The concept is that most of the buildings are basically repurposed pods which made things easy once I worked up a basic design concept.


In addition to being used for the hab centers, I am also going to build a couple of the larger units to use as domari and vardinari barracks.

The final piece for the outpost (other than the transmat of course) will be the manor house of the vard.  This will be the largest piece in the outpost and will have multiple levels as well, making it the defensive heart of the outpost.  This one is still more of a concept at the moment but I am going to follow the container theme that I have been carrying through, just making it a bit more elaborate is all.

So far I'm happy with how these are coming out though there is the issue of the seams between the plates.  I tried using hot glue to fill the valleys but once they dried they became quite concave.  Instead I want to pick up some adhesive foam sheets to use for various details, in particular as angle pieces running along those corners.  That should make them look a lot cleaner structurally and using the foam should let me quickly add some details to the various buildings.  Then I can start hitting these with paint and I think that will really make them pop, but more on that next week.  Until next time...

Thursday, October 3, 2019

Workbench: The World Is Taking Shape

My plans for more painting have been temporarily put on hold (It's all your fault Shepard!) but the terrain has been coming along very well. Here is a shot of the 4' x 4' board with a variety of terrain laid out to give you an idea.


I even played another solo game to try this mix out.  Algoryn vs Concord in a 500 point skirmish game.  Algoryn won again thanks to their dirty x launcher.  "You get a pin and you get a pin and you get a pin!"  Still fun and good to keep the rules fresh in my mind.  It also inspired me to make more hills.  How many more?  Well...


About this many.  As you can see a good chunk of these are still in progress but I should be able to get them finished up next week.  I'm also going to grab some of my old forest terrain from home over the weekend and re-base it so that it matches up with what I'm currently using.  Slowly but surely making progress... as long as I can keep from playing too much Mass Effect 2.  Until next time...

Friday, September 27, 2019

Workbench: The Hills Are Alive With The Sound Of Mag Guns...

Last week was almost a bust thanks to the changing seasons.  Gotta love allergies.  Thankfully things are slowly getting back on track this week and I decided to dive into expanding my terrain options.  I've been brainstorming some ideas for buildings constructed from foam core but need to grab a couple of white pens before I can really push forward with those.  Why white?  Instead of using the plain white boards, I decided to use black boards instead.  This should make the painting process a bit since there is no base coating required; it's already black!  It'll be interesting to see how it actually plays out but fingers crossed.

In the meantime, I dug out a utility knife and started cutting up some of the spare insulation board to make some hills.  Inspiration for the technique is straight from the Tabletop Warlords, specifically the Modular Hills episode from their Antares Build playlist.  Currently it's the only episode in that playlist but that's because of all the other Gates of Antares content they've been churning out which I definitely recommend checking out.

For my hills, I followed most of Kevin's suggestions and so far I'm really happy with the end result.  I did "flock" mine slightly differently (aka not at all) because I glued cut fabric to the tops instead of going whole hog with more traditional basing material.  This keeps them in line with my other terrain pieces though and I think that will help pull them all together visually.

Just a quick shot for this week but I think they look pretty good.
In addition to the hills, I've also started shaping some of the off cuts into boulders so I can put together some rocky outcroppings.  This will mix up my terrain options a bit more and add more variety to the mix.  So far I'm sticking with my more verdant board but eventually I'll start working on putting together my desert world as well.  As I already had a head start with the green board, it only makes sense to finish that one first and then move on.  This also works well for other gaming options as the green board can be used for other systems a bit easier than my shocking yellow desert.

I'm also going to try to do something to kick start my painting.  With my three armies nearly complete, I've been having a heck of a time sitting down to finish the few models that I have left.  I've tried painting other genres to try to kick the painters block to the curb but there's been enough of a break that I'm really frustrated with the quality that I'm producing.  Only I get the current projects situated, I'm going to try to work out a painting routine doing just one figure a day to keep my hand in practice.  Most of these will be just quick paint jobs but that seems like the perfect thing for this time of year.  After all, it's almost Zomtober.  Normally I'm not a big zombie fan but I did pick up some of the Zombicide Black Plague game.  These will fit into any fantasy setting quite nicely and this will be the perfect excuse to get some paint on them.  Until next time...

Monday, August 5, 2019

Workbench: More Terrain and More Cheese

Well, craziness for work has really pushed my release schedule off but I think that things are getting back to... "normal"?  Is that the right word?  Guess it'll have to do for now, but without further ado, let's take a look at what's on the workbench!

A couple of weekends back, I decided to pop into Michael's to see if there was anything cheap I could use for more terrain.  I feel like I'm making slow progress in that department but I really wanted something I could use to visually fill out the board more.  Luckily enough, they were running a 70% sale on spring floral so I grabbed a floral mat along with another 20 wooden discs for terrain basing.  A little bit of hot glue, some plants, add some fabric to cover the wood and bam!  Instant plant cover!


These pieces will work great for filler terrain on the larger discs plus I can use these as scatter terrain as well. Can't beat the price either; the mat was regularly $20 but 70% off knocks that down to $6 and I can make about 25 of these from the one mat.  Plus I like how they look together with the other terrain I have.


Here is a 2' x 4' section of table with most of the plant cover I have with me. A pretty good density overall and I'm liking the variety of plants too.  Gives it a nice organic look by not having to too structured.

In addition to this, I'm also working putting together some "buildings" that I have had lying around for years.  I'd seen these dirt cheap cups and bowls at Wally World back when I was demoing Starship Troopers for Mongoose Publishing.  I'd grabbed a bunch of them to use for some Skinnie structures but the bottom fell out of the game before I did anything with them.  Fast forward a decade or so and I've finally started working on them.


For now I have just painted them black so I can get them to the table.  Ultimately, there will either be a tan or grey dry-brushed onto them, and I still need to work out attaching some details to them but at the very least this gives me more terrain to put on the board for now.

And last but not least one of my friends is moving across the country but before he goes, we are having a Bolt Action tournament in his honor.  This one will be a more traditional 750 point list but it has to be exactly 8 order dice.  I'm sure there are plenty of viable options that can be fielded within the point limit but after the last tourney I just wanted more cheese.  In fact, let me introduce... the Big Cheese.


The core of this list will be an M26 Pershing heavy tank.  Yep, a heavy tank in a 750 point list.  In addition to the tank, there are the obligatory two six man late war squads with two BARs in each, a 2nd Lt with an assistant/bullet shield, a medic to patch the guys up as they get shot, a medium mortar team with a spotter to rain down on the enemy, and not one but two medium machine gun teams.

The real trick will be keeping the Pershing alive. Unlike Stewie, the Big Cheese is only rolling ten dice when I fire the MMGs but there is that super-heavy anti-tank gun that can seriously reach out and touch people.  Big Cheese is also more than half of my points so if someone gets lucky... game over, man... game over!

So why am I bringing such a ridiculous list to this tournament?  Well, I guess basically I feel the need to be a jerk, aka "That Guy".  Normally I am very easy going about gaming.  I spent a couple of years playing the Warmachine seasonal campaign which are basically tournaments and it just gets to be a drag.  I want to play for fun, something that I really struggled with at the BA Combat Patrol tournament.  I openly admit that I'm not strong on the rules for Bolt Action, but one of the "experienced" players I faced was making up rules and completely ignoring others, all the while really being an ass about it.  Honestly I was ready to just wash my hands and walk away, it was that frustrating for me.  So for me this tournament is about making things right.

I've been going over the rulebook and making notes of things that I wasn't aware of or that I know were just played straight up wrong, and I plan on slamming the rule book down on the table.  This will probably be the last Bolt Action game that I play but I'm going to make sure that I have a good time as I drive around the field with my ridiculous tank and blow the crap out of things.  Either way, I'll be sure to let you know how it goes.  Until next time...

Thursday, June 6, 2019

Workbench: Gardening Of Antares

Since I'm still traveling out of town for work, decided to add some more terrain to what I have to work with.  Looking through the bits and pieces that I've been digging out while cleaning up my office, I was surprised at some of the stuff I've picked up.  I'm still focusing on more verdant terrain but trying to do things that are a bit more alien looking.


A lot of these are still works in progress, but these will give me more options as I try something completely different...


...gaming on the floor.  This bumps up my available gaming space to just shy of 4' by 5', a much more respectable size than the 2 1/2' by 3' that I have been using.  Unfortunately I don't have any hills available but I think I have enough other terrain to break things up and make it interesting.

Speaking of interesting I also brought along my Goritzi and Teknes armies so I can finally push around Wraith of Kings, plus the friendly neighborhood Ghar have made an appearance for more Antares action.  Now I just need to figure out which one will be first.  Until next time...